A glam photo booth is the black-and-white, high-contrast “editorial” booth style you’ve seen at upscale weddings—clean background, flattering light, and a subtle glam filter photo booth finish. If you want the look without the rental logistics, you can create a black and white glam photo booth strip online, download it, and share it in minutes.
What a Glam Photo Booth Is (And What It Isn’t) in 2026
Most “glam booth” pages focus on the vendor package: an attendant, a printer, a backdrop, and a promise of “celebrity-style” results.
Here’s the deal: the glam look is not magic software. It’s a recipe.
- Glam is: controlled light + a clean background + black-and-white tone + gentle skin smoothing.
- Glam isn’t: cranking every beauty slider to 100 or relying on a random “B&W” filter with harsh contrast.
If you nail the recipe, you can get that timeless look with a simple setup—and you don’t need a complicated workflow for guests.
Pro Tip:
The Unique Angle: The Filter Is the Last Step, Not the First
Most people think a glam photo booth is “a special filter.” But actually, the glam look is mostly lighting and background discipline—then the filter polishes what’s already clean.
That matters because it changes what you optimize:
- If your lighting is messy, skin smoothing will look fake and waxy.
- If your background is busy, black-and-white will amplify clutter.
- If your exposure is off, a glam filter won’t fix blown highlights on a white backdrop.
Bottom line? Start with a simple physical setup (even at home), then use software to finalize the strip.
The Glam Look Recipe: Lighting, Backdrop, Camera, Then Black & White
You only need four ingredients for a wedding-ready glam strip.
1) Soft, even light (the “no harsh shadows” rule)
Theory: Glam photos look expensive because faces are evenly lit. Shadows disappear. Skin texture looks smoother even before editing.
Here’s exactly how to do it:
- 1Place the light slightly above eye level
A ring light or soft LED panel works. Keep it centered so you don’t get dramatic side shadows.
- 2Stand 1–2 meters from the background
This helps the background stay clean and reduces hard shadow edges behind your head.
- 3Lower brightness before adding contrast
If you’re on a bright white backdrop, slightly underexpose instead of overexposing. You can brighten later.
2) A clean backdrop (white or very light neutral)
Theory: The iconic glam vibe comes from separation. The background should never compete with faces.
Let me show you the exact steps:
- 1Pick one backdrop color and commit
White is the classic. A light neutral works if your venue lighting is warm.
- 2Remove visual noise
Move chairs, bags, and signage out of frame. Black-and-white turns “small clutter” into “big clutter.”
- 3Use a tighter crop for groups
For 3–5 people, move the camera back and crop tighter on the strip so the background stays minimal.
3) Black-and-white tone (timeless, not muddy)
Theory: “Glam B&W” is usually bright midtones, clean whites, and controlled contrast—so skin stays flattering.
Theory aside — here’s how it actually works:
- 1Convert to black and white first
Don’t do “contrast first.” Convert first, then adjust.
- 2Add contrast in small steps
Stop before pores, wrinkles, and lint become the main character.
- 3Keep highlights under control
White backgrounds look premium only when they still have detail.
Pro Tip:
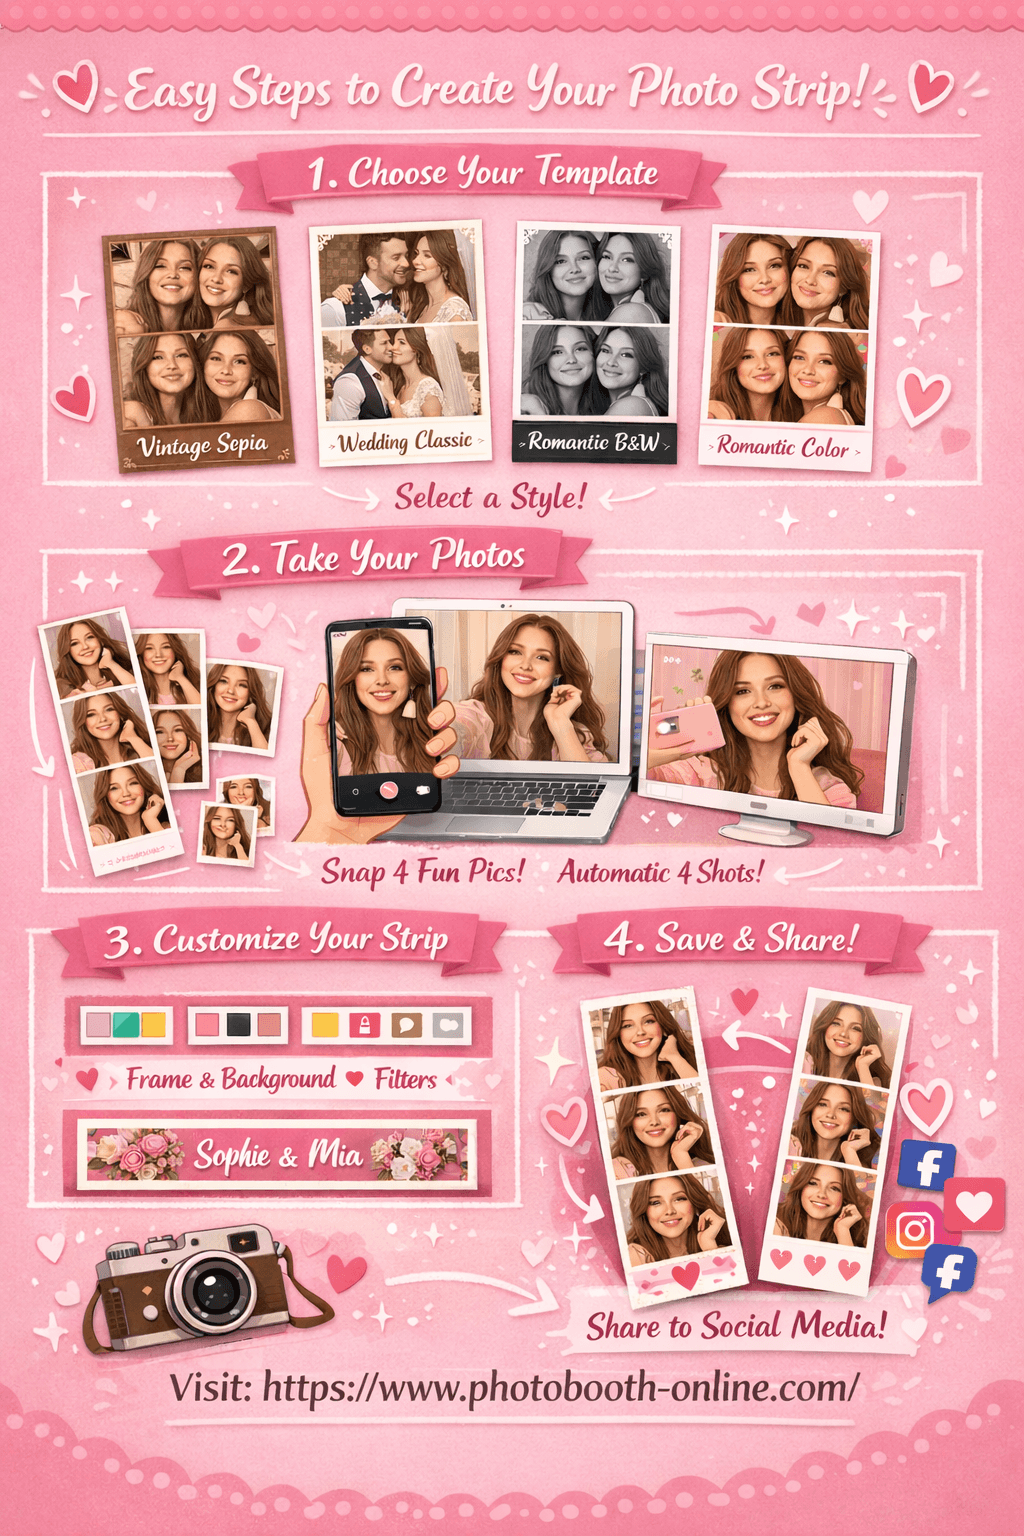
DIY Glam Photo Booth: Make a Glam-Style Photo Strip Online
If your goal is a shareable strip (not a staffed kiosk), you can do a glam-style workflow fully online.
Here is the step-by-step process:
- 1Choose a black-and-white template on the homepage
Go to the Photobooth Online homepage and pick a black-and-white style card (for example, a romantic black-and-white look) so your strip starts in B&W.
- 2Capture your 4 shots
Use steady, even light and keep your face pointed toward the camera for consistent results.
- 3Customize your strip (optional)
In the editor, you can adjust background color, add stickers, change the footer text, or tweak filters until it matches your event style.
- 4Export, save, or share
Download the final strip to your device, or share it directly. If you want to tweak it later, you can quickly redo the styling in Customize.
We tested exporting the Romantic Black & White look (grayscale filter) on Photobooth Online—here’s exactly what happened: the downloaded PNG preserved the black-and-white tone across all four frames, so your strip looks consistent when you print or post it.
What Real Couples and Booth Pros Keep Asking About Glam Booths
Budget and “is it worth it?” comes up constantly—especially for weddings.
“The company I reached out to and found that do it costs about $800 for 4 hours… I’m just trying to decide if it stretches us is it worth it getting the glam Photobooth or put that money towards the bar instead.” — WeddingWire thread
And there’s confusion about definitions too:
“Glam Photo booth just means BLACK AND WHITE photo fyi” — WeddingWire thread
Here’s the deal: glam isn’t only black-and-white. It’s black-and-white plus flattering light, plus subtle enhancement. If you don’t have the enhancement, you can still get 80% of the vibe by getting the light and background right.
Advanced Strategies
1) Design for the 2x6 strip first (then adapt to 4x6)
Theory: Most glam booths look premium because the layout feels intentional. Strips force you to simplify.
Here’s exactly how to do it:
- 1Choose one layout for the whole event
Don’t offer five layouts. One consistent strip looks more “editorial.”
- 2Use fewer words on the footer
A short footer reads luxury. Too much text reads “template.”
- 3Keep margins wide
White space is the cheat code for expensive-looking design.
2) Run a “pose sequence” so guests look confident in every frame
Theory: Glam strips look better when each of the 4 frames has a different expression—without chaotic movement.
Let me show you the exact steps:
- 1Frame 1: neutral + chin slightly down
This is your safe shot.
- 2Frame 2: soft smile
Keep shoulders relaxed—tension looks harsh in B&W.
- 3Frame 3: turn 10–15 degrees
A small angle adds definition without breaking the filter/lighting consistency.
- 4Frame 4: bigger expression
Laugh, wink, or “red carpet” grin—this is the shareable one.
3) Calibrate smoothing intensity by skin tone (don’t guess)
Theory: Strong smoothing can look great on one face and terrible on another. The same setting is not “fair”—it’s inconsistent.
Theory aside — here's how it actually works:
- 1Start at a lower intensity than you think
Especially for pale skin tones, lighter smoothing often looks more natural.
- 2Increase only if texture is distracting on the final strip
Your goal is flattering, not “AI airbrush.”
- 3Use a straight-on face angle for best detection
Some glam filters won’t apply when faces are angled away from the camera. — Booth.Events (YouTube)
Pro Tip:
Common Mistakes to Avoid
1) Treating “glam” as a filter instead of a setup.
Why it hurts: you get harsh shadows and waxy smoothing.
Fix: start with soft, even light and a clean background, then apply B&W and subtle enhancement.
2) Blowing out the white background.
Why it hurts: the image looks cheap and “flat,” and skin loses detail.
Fix: slightly lower exposure, then add contrast slowly.
3) Over-smoothing skin (especially for pale skin tones).
Why it hurts: you lose texture in eyes/lips and faces look plastic.
Fix: reduce intensity; increase only if the final strip still needs polishing. — Booth.Events (YouTube)
4) Expecting the filter to work when faces aren’t facing the camera.
Why it hurts: some glam filters won’t apply on angled faces, so results look inconsistent.
Fix: keep faces more or less straight-on for the hero frames, then experiment with angles after you’ve got a “safe” strip. — Booth.Events (YouTube)
FAQ
What is a glam photo booth?
A glam photo booth is a photo booth style that uses flattering light, a clean background, and a black-and-white editorial finish. Many setups also add subtle skin smoothing for a more polished result.
Is a glam photo booth just black and white?
No. Black-and-white is the signature look, but true glam also depends on soft, even lighting and a simple background. Without those two pieces, B&W alone can look harsh.
How much does a glam photo booth cost for a wedding?
Pricing varies by city and package, but many wedding quotes land anywhere from a few hundred dollars to around $800 or more depending on hours, prints, and staffing. If budget is tight, a DIY or browser-based strip workflow can still give you the look for less.
How do I get the Kardashian-style glam look?
Start with soft, centered lighting and a clean white backdrop. Then convert to black and white, add gentle contrast, and use smoothing only when the final strip still needs a little polish.
What’s the best glam filter photo booth setting?
Start subtle. Strong smoothing can look plastic fast. A safer workflow is to begin with a lower intensity, review one full strip, and only increase the effect if the final output still looks too raw.
Can I create a glam photo booth strip online?
Yes. Choose a black-and-white template, capture your four shots, optionally tweak the strip, and export the final PNG. You can start in Photobooth Online and fine-tune the result in the editor.
What print size is best: 2x6 or 4x6?
2x6 strips feel more classic and editorial, which fits the glam aesthetic well. 4x6 prints are easier to frame and work better if you want a postcard-style keepsake.
Why do glam booth photos look better than normal booth photos?
Because the setup is more controlled. Better lighting, a simpler background, and a consistent black-and-white tone do most of the work. The filter is usually just the finishing touch.
Ready to create your own photo strip? Try Photobooth Online free → — no download, no signup needed.