If you want a save the date that feels playful and personal, a photo strip save the date gives you four tiny snapshots that tell your story. You can turn one quick shoot into a vertical strip that looks like it came out of a vintage booth. In this guide you will see what a photo strip save the date is, how it compares to standard cards, and how to design your own save the date photo strip online in a few minutes.
What is a photo strip save the date?
A photo strip save the date is a wedding announcement that uses a vertical photo booth strip instead of a single hero photo. You stack three or four frames in a narrow layout, then add your names, wedding date, and a short line like "save the date" or "we are getting married". Guests pin it on the fridge like a mini film strip.
Most people think save the dates must be flat cards or magnets with one centered image. In reality the save the date photo strip format is just a different frame for the same details. You can print it on card stock, send it as a digital image, or turn it into save the date photo strip magnets that sit on a fridge for months.
Because the strip is tall and narrow, close up photos work best. Think of a quick sequence where you both look at the camera, laugh, hold a sign, then kiss or cheer. That set turns into a save the date photo strip that feels candid, even if you plan every frame in advance.
Pro Tip: Shoot for the strip, not the album
Frame your save the date photos in portrait orientation with your faces near the center. Leave some headroom so crop tools can stack the frames without cutting off hair or props.
Pros of using a photo strip save the date:
- Shows more personality than a single posed photo.
- Works perfectly for text message or email save the dates.
- Easy to reuse the strip later on your wedding website.
Cons to keep in mind:
- Needs slightly more planning during the photo session.
- Small text can be hard to read if you overload the design.
- Tall aspect ratio may not match every print vendor template.
How to create a photo strip save the date with an online photobooth
Photobooth Online lets you shoot four frames in your browser, no download or sign up. You pick a wedding ready template, take your photos, and export a tall strip that already feels like a save the date photo booth strip. Then you only need to add names and date in a simple editor.
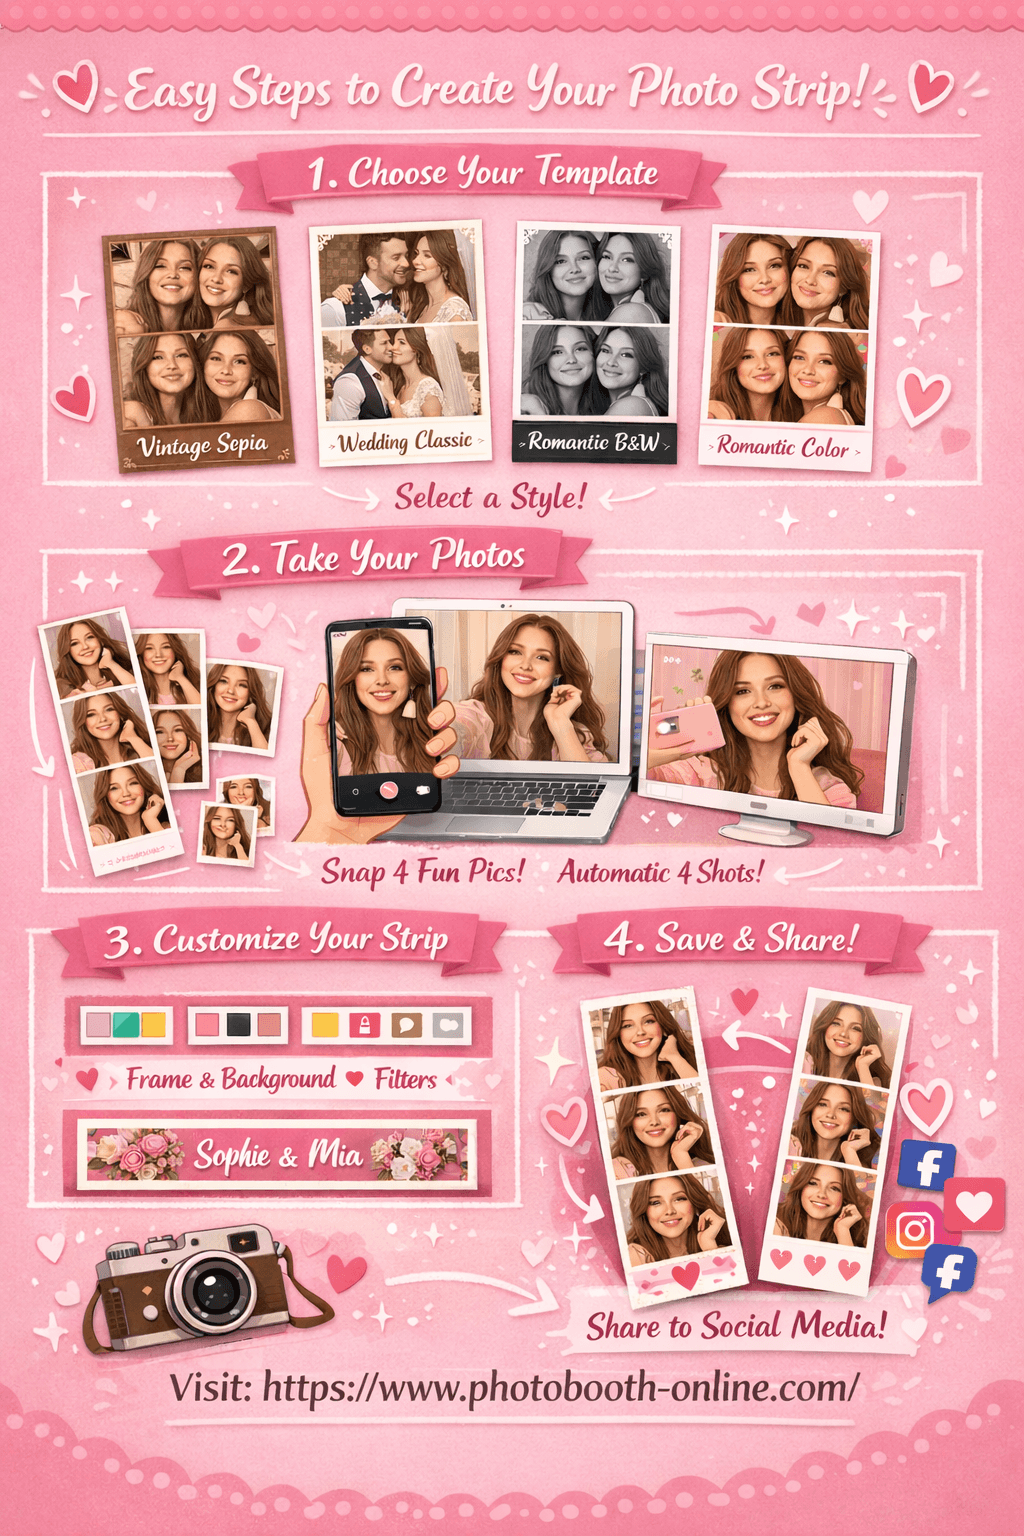
- 1Step 1: Choose Your Template
Head to the tool and pick from 4 templates: Vintage Sepia, Wedding Classic, Romantic Black & White, or Romantic Color. Each template has a unique color tone and style to match your occasion.
- 2Step 2: Take 4 Photos
Allow camera access and click the shoot button. The app automatically takes 4 shots with a countdown timer between each. Your photos appear as thumbnails in real time as you shoot.
- 3Step 3: Customize & Download
Adjust border color, background, filter, and footer text on the right panel. Preview updates instantly on the left. Hit "Download Photo Strip" to save. On mobile, long-press the image to save to your camera roll.
Why users love Photobooth Online for save the date photo strips:
- ✅ 100% free. No hidden fees, no subscription required.
- ✅ No download or sign up. Open your browser and start instantly.
- ✅ Photos stay on your device. Nothing is uploaded to any server.
- ✅ Works on any device. iPhone, Android, laptop, or tablet.
- ✅ 4 professional templates with real-time customization.
- ✅ Download in seconds. Full-resolution photo strip ready to share.
Pro Tip: Turn your strip into a save the date in minutes
After you download your strip, drop it into a simple design in Canva or your editing app. Add your names, wedding location, and date underneath the strip, then export a single PNG you can text or email.
Photo Strip Save the Date Sizes, Formats, and Printing Tips
Photo Strip Save the Date Common Sizes
Photo strip save the date cards usually mimic the classic photobooth strip shape, which is tall and narrow. This format makes the design instantly recognizable and works well for showing three or four photos in sequence.
The most common sizes include:
2 × 6 inches
This is the traditional photobooth strip size. It fits four small photos stacked vertically and is perfect if you want a nostalgic photobooth look.
2.5 × 7 inches
A slightly larger version that provides more space for text such as names, wedding date, or a small message.
3 × 7 inches
A popular modern format used for save the date cards. It keeps the strip style while allowing larger photos and clearer typography.
4 × 8 inches
Often used when the design includes both photo strips and extra information such as venue or QR codes.
If you plan to send save the date cards by mail, choose a size that fits standard envelopes to avoid extra postage.
Popular Photo Strip Save the Date Formats
There are several design formats couples commonly use when creating photo strip save the date cards.
Classic four-photo strip
Four vertical photos with small spacing between them. The wedding date is usually printed at the bottom.
Film strip style
Inspired by old film reels. The design includes black borders and small frame details around each photo.
Minimalist photo strip
Clean white or neutral backgrounds with simple typography and two to four photos.
Photo strip with QR code
Many modern save the date cards include a QR code that links to the wedding website or RSVP page.
Bookmark style photo strip
A taller version designed to function as a bookmark. Guests can keep it as a memorable wedding keepsake.
Printing Tips for Photo Strip Save the Date Cards
Good printing can make a big difference in how professional your save the date cards look.
Use high-resolution images
Photos should be at least 300 DPI to ensure they look sharp when printed.
Choose thicker paper
Cardstock between 300 and 350 gsm gives the card a premium feel and prevents bending during mailing.
Consider matte or soft-touch finishes
Matte finishes reduce glare and make photo strips look more elegant.
Check margins and bleed areas
Leave a small margin around the edges so important text or faces are not cut during printing.
Print a sample first
Before printing a large batch, test one or two cards to make sure colors, layout, and size look correct.
Using the right size, format, and print quality helps your photo strip save the date stand out and creates a memorable first impression for your wedding guests.
Case study: turning a quick DIY shoot into a save the date photo strip
On r/DIYweddings, couples often talk about save the date budgets and how quickly costs climb when you add custom printing and postage. One bride shared that she considered postcard style save the dates, but decided to DIY her own using photo paper, a home printer, and a simple edit. The key idea was to keep the layout narrow, use three or four frames, and print several strips per sheet before cutting them down. — r/DIYweddings: advice for making your own save the dates
This kind of real world story shows why a save the date photo strip works so well. You only need one dedicated afternoon to take photos and test layouts. Once you have a design you love, you can either send it digitally, print it at a local shop, or turn it into save the date photo strip magnets through an online print service. The creative part happens once, then the strip keeps working for every guest.
If you prefer a browser based workflow, you can follow that same pattern using a tool like Photobooth Online for the shoot, and any basic design site for text. You choose the template that matches your wedding style, record a quick shoot, and download the strip. Then you drop that strip into a 5x7 canvas and add your wording, which gives you a custom save the date photo booth strip without paying for complex editing.
Why this approach works well:
- Keeps printing flexible, from home printer to online labs.
- You design once and reuse for print, digital, and magnets.
- Guests instantly understand the vibe when they see the strip.
Where you still need to be careful:
- You need to test a few crops so text stays readable.
- Cutting strips evenly at home takes some patience.
Tools you can use for photo strip save the dates
Because a save the date photo strip is just an image, you can mix and match tools at each step. One tool can handle the photo capture, another can handle layout, and a print vendor can handle paper or magnet production. Here is a simple stack that keeps things low cost and easy to manage.
Capture tools
- Photobooth Online — browser based, free, takes four photos and exports a tall strip.
- Your phone camera — use burst mode or a tripod and timer, then assemble the strip later.
Layout tools
- Canva or Figma — great for adding "save the date" text and trying different fonts.
- Any simple collage app that supports vertical grids and equal sized cells.
Printing and magnets
- Local print shops — print your save the date photo strip design as 4x6 or 5x7 cards.
- Online magnet services — upload the strip and order save the date magnets photo strip style for fridges.
Pro Tip: Keep one master strip file
Save a clean version of your strip without text in a safe folder. You can reuse it on your wedding website, programs, or thank you cards without recreating the shoot.
Advanced ideas for photo strip save the date designs
Once you have the basic save the date photo strip, you can push the design further without adding much work. These ideas help your strip feel custom while still being quick to execute.
Idea 1: make a mini storyboard strip
Theory: A save the date photo booth strip can tell a tiny story instead of four random faces. When each frame has a role, the strip feels intentional and guests remember it more.
Here is the step-by-step process:
- 1Frame 1: simple introduction
Stand side by side and look at the camera. This frame anchors the strip and makes your faces clear.
- 2Frame 2: show a prop or date sign
Hold a small sign or letter board with your date. Keep the text big and simple so it stays readable in a narrow frame.
- 3Frame 3: candid laugh or movement
Look at each other, laugh, or do a quick spin. This keeps the save the date photo strip from feeling stiff.
- 4Frame 4: close moment or kiss
End with a kiss, forehead touch, or raised hands so the strip finishes on a high note.
Idea 2: design save the date photo strip magnets
Theory: Guests often forget paper save the dates, but magnets stay on the fridge. When you turn your strip into a save the date magnets photo strip, you get daily visibility without more copies.
Here is the step-by-step process:
- 1Step 1: Export at high resolution
Export your strip at 300 dpi or the highest quality your tool allows. This keeps faces sharp on the final magnet.
- 2Step 2: Choose a tall magnet size
Look for vendors that offer vertical magnet sizes close to your strip ratio, like 2x6 or 2.5x7 inches.
- 3Step 3: Add a small border for bleed
Leave a little empty space around the edge of your design so no text is trimmed when the magnets are cut.
Idea 3: match your strip to your wedding website
Theory: When your save the date photo strip, website, and invitations share the same colors and fonts, your whole wedding brand feels intentional.
Here is the step-by-step process:
- 1Step 1: Pick two core colors and one accent
Use the same palette across your strip, wedding website, and later invitations. Think soft blush, deep green, and a neutral.
- 2Step 2: Reuse fonts across platforms
Choose one serif and one sans serif font that you can use in your strip, on your site, and in printed pieces.
- 3Step 3: Add your URL or QR code under the strip
Place a small line with your website URL or a QR code below the strip so guests can go straight to your details.
What real couples say about DIY save the dates
Community threads show the same pattern over and over. Couples want save the dates that feel personal and fun, but they do not want to overspend on something that guests might throw away. In DIY wedding forums, people share that they often print multiple save the dates per sheet, trim them at home or at FedEx, and use coupons and sales to reduce cost. — r/DIYweddings
"We printed our save the dates ourselves on photo paper and cut them down, so it only cost a few dollars for ink and paper." — r/DIYweddings
On broader wedding planning forums, couples often debate whether to send physical cards or digital save the dates. Many decide that digital save the dates are fine as long as they look intentional and pretty. A save the date photo strip fits this perfectly, because the image already feels special even if you send it by text or email.
Another recurring theme is magnet formats. Many couples love the idea of save the date photo booth strip magnets, but worry about cost. A simple way to handle this is to only order magnets for close family and the wedding party, then send digital or card versions to everyone else. That way the people who see you most often get the fridge reminder without pushing your budget too far.
Why Couples Love Photo Booth Style Save the Date Cards
Photo booth style save the date cards have become increasingly popular in modern weddings because they feel more personal, fun, and memorable than traditional announcement cards. Instead of a formal design with only text, couples can share real moments and personality through photos.
They feel more personal and authentic
Photo strip save the date cards allow couples to showcase their relationship through a sequence of photos. Whether it is playful expressions, romantic poses, or candid laughter, these images help guests feel more connected to the couple before the wedding day.
They create a fun and memorable first impression
A photobooth style design immediately stands out in the mail. The vertical photo strip format looks unique compared to traditional save the date cards, which often use a single image or simple typography.
They capture real emotions and personality
The multi-photo layout makes it easy to show different moods or moments. Couples can include smiling, playful, or romantic shots that reflect their personalities and relationship style.
They are perfect for modern wedding aesthetics
Photo strip designs work well with many popular wedding styles such as minimalist, vintage, retro, or cinematic themes. Black and white photobooth strips are especially popular for elegant wedding announcements.
They are easy to design online
With modern online templates and photo booth tools, couples can create photo strip save the date cards quickly. They simply upload their photos, customize the text, and download a ready-to-print design.
They double as a keepsake for guests
Because the design resembles a classic photobooth strip, many guests keep these cards as small souvenirs. Some couples even create bookmark or magnet versions so the save the date can be displayed or reused.
For couples who want their wedding announcement to feel playful, stylish, and memorable, photo booth style save the date cards offer a creative way to share their story.
7 common photo strip save the date mistakes to avoid
Even a strong design idea can fall flat if you miss small details that matter for prints and digital sharing. Here are seven common mistakes that show up in community threads and real save the date photo strip examples, plus how to fix them.
-
Too much text in a tiny space
If you cram your entire invitation onto the strip, the text shrinks until it is unreadable. Keep the strip to names, date, city, and your website. -
Low resolution photos pulled from social media
Screenshots or compressed images blur when you print them at 2x6 size. Always export from your camera or photobooth tool at full quality. -
Busy backgrounds that fight with the text
Patterns or clutter behind you can make type and faces hard to see. Use a clean wall, curtain, or simple outdoor background. -
Inconsistent lighting across frames
If you move between shots or mix different rooms, the strip looks disjointed. Shoot all frames in one spot with the same light. -
Colors that do not match your wedding palette
If the strip uses colors that clash with your later stationery, everything feels disconnected. Choose border and background colors that match your wedding palette. -
Forgetting mailing size rules
If you plan to mail physical save the dates, check postal size rules before printing. Odd sizes or very small strips may need special envelopes or extra postage. -
Sending only one format to every guest
Some guests love magnets, others prefer digital. Mix formats based on budget and preferences instead of forcing one option on everyone.
Pro Tip: Print one test strip before placing a full order
Send a single test file to your chosen printer or magnet vendor before you order for every guest. Check color, text size, and cropping in real life, then adjust once instead of fixing a whole batch.
FAQ
What is a photo strip save the date?
It is a wedding save the date design that uses a vertical photo strip with three or four frames plus your names and date. It looks like a photo booth strip instead of a standard flat card.
How do I make a save the date photo strip online?
Use a browser based photobooth to shoot four photos, then download the strip at full resolution. Drop it into a simple design tool, add your text, and export as a PNG or JPEG.
Can I turn my photo strip into save the date magnets?
Yes. Upload your completed strip to a magnet printing service and choose a tall size like 2x6 or 2.5x7 inches. The result is a save the date photo strip magnet that lives on your guests’ fridges.
What photos work best for a save the date photo booth strip?
Close up shots where both of you are clearly visible work best. Use one serious frame, one prop frame, one laughing frame, and one kiss or cheer frame.
Do I need a real photo booth to create a photo strip save the date?
No. A free online photobooth or a simple collage app can create the strip from your phone or camera photos. You only need a real booth if you want the in person experience at your engagement party.
Can I send a photo strip save the date by text or email?
Yes. Export your design at a resolution that looks sharp on phones and attach it to your message. Make sure the date and your website are readable on a small screen.
How early should I send photo strip save the dates?
Most couples send them six to eight months before the wedding, or earlier for destination weddings. This gives guests time to plan travel and time off.
Ready to create your own photo strip save the date? Try Photobooth Online free → — no download, no signup needed.